How to remove a pickup cover
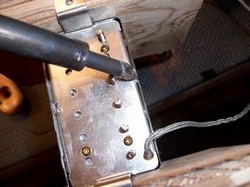
First things first, you need to remove the little bit of solder that is holding the cover to the pickup base plate. I like to use a soldering gun and a solder sucker but anything that will safely break that connection without harming the pickup is fine.
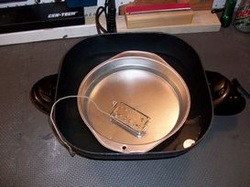
Next I give it a nice warm bath in a double boiler set up to loosen the wax that is holding it on. I have also had luck just letting it sit in a sink full of hot water
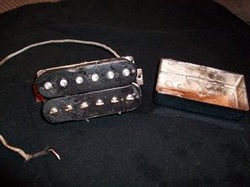
After a few minutes the wax is softened enough to pull the cover off......
....while it is still warm take a soft cloth and wipe the residual wax off the pickup then give the plastic bobbins a buffing with a dry cloth to shine them up a bit.
FYI- to put a cover on a pickup first make sure the cover fits your pickup (no, they are not all the same). Then solder the cover to the base; one small solder connection on each side is plenty to keep it on and make the grounding connection.
Next set up a double boiler similar to like I have above but instead of water in the second (smaller) pan you will be using wax; regular paraffin works fine but a combination of paraffin and bees wax seems to be popular with a lot of pickup manufacturers.
Melt enough wax to cover the pickup and then drop the pickup in making sure the wire is hanging outside of the wax and not near the heat source. You will see some air bubbles coming out of the pickup as the wax displaces the air, after about 10 minutes or so you can remove the pickup and wipe off the excess wax with a soft, dry cloth.
Warning! Do not melt wax near an open flame including gas stoves. Use an electric skillet or electric stove and always do it in a double boiler style setup.
Guitar Nuts - I have a bone to pick with you
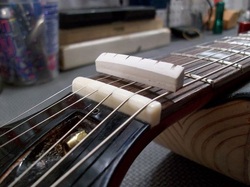
With all the fancy material out there to make nuts out of it can get a bit confusing. Most low cost guitars (and some expensive ones) come with plastic nuts which can
Graph Tech makes a synthetic ivory material (yes nuts were made out of elephant tusks at one time) that they call TUSQ which makes a good nut and is easy to work. You can buy them with pre-cut slots or in blanks.
If you need a nut that allows the strings to slide through slots such as on a tremolo equipped guitar the Graph Tech graphite material makes very nice nut but the black graphite doesn't look good on vintage guitars and it doesn't last very long. Graph Tech now makes the XL line which is white and made out of a Teflon impregnated material which lubricates the strings as they move back and forth through the slots.
Of all the materials, I find bone to be the overall best choice for a nut if it is done correctly. If a bone nut is cut well and the slots are polished it will not only let the strings slide back and forth without binding up, but it also sounds and looks beautiful. Bone has variegated colors that run through it and every piece is different looking. You can get bone in both white (which is really an off white) and vintage which is a more amber color.
Below you see a new bone nut I installed on a Gibson Les Paul Studio and above it is the original nut which is made out of plastic or maybe Corian. Not only does the bone look better with it's highly polished surface, it sounded better too.
How-To Remove Stuck Knobs
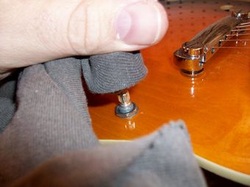
This is a simple but very effective way to remove those stuck on knobs. If your knobs are hard to remove check first to see if they have a set screw before doing this.
Just wrap a cloth under and around the knob and with even pressure, gently pull it up and off.
Just wrap a cloth under and around the knob and with even pressure, gently pull it up and off.
How to make your own neck rest for your guitar.
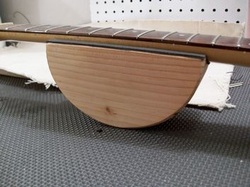
All you need is a couple pieces of scrap 2x4, glue, jig saw, padding and some sandpaper.
1. Just draw a half circle on two separate pieces of 2x4 (use the full 3 1/2 inch width) and cut them out with a jig saw or whatever saw you have that can cut a curve. it doesn't have to be perfect, you can sand out any rough areas
2. Glue them together and clamp or set something heavy on them while they dry. Elmer's white glue will work fine.
3. After they are dry (12 hours) sand them so they have a nice smooth feel and round all the edges.
4. Now the hard part, hollowing out the center "U" shape area for the guitar neck. You can put some 50-80 grit sandpaper on a baseball bat and run it back and forth or of you have the tools you can cut slots in varying depths in the shape of a "U", break them out and then sand smooth. You can also cut some of the wood away before you glue them to save you some time.
5. Cover the "U" shape area with something that will protect the neck. A good choice is cork or felt.
